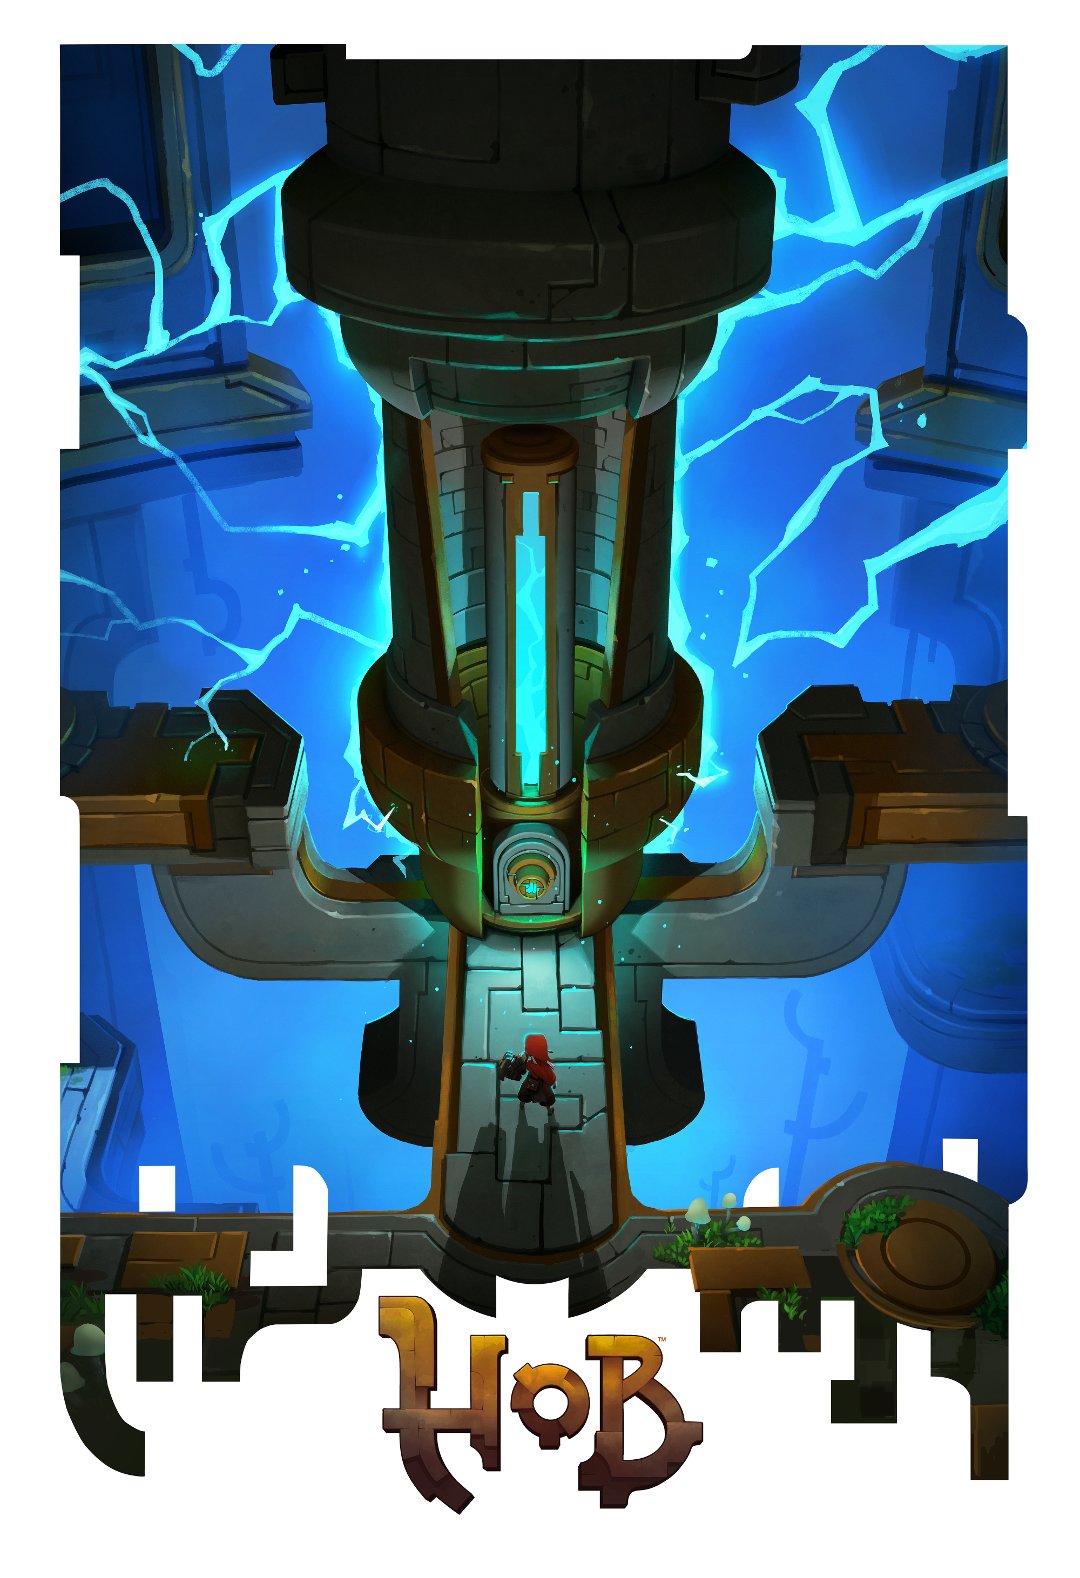
Today we're showcasing the work of artist Tim Kaminski, the designer behind one of our three "Make it Home" posters. Read on for more.
About Tim Kaminski
Born and raised in Northern Michigan, Tim started drawing wildlife at a young age, but didn't start pursuing art extensively until attending Northern Michigan University for an Illustration degree. He graduated in 2007 and moved to Chicago to work as a graphic designer, which he found despicably boring, so he decided to go back to school, he attended Savannah College of Art and Design and received his Masters in Illustration in 2013.
With an expensive degree in hand he got a concept art job at an indie studio, and also began doing freelance concept art. Tim's art focuses on vividly colored environments with a tendency for combining ancient and science fiction style structures. His work uses a combination of 2D drawing in Photoshop and 3D modeling and rendering in Zbrush and Keyshot, which is then painted over in Photoshop. Always looking to improve he continues to evolve his process and build his skillset.
Inspiration
My inspirations are all over the place. As a kid I was really inspired by Disney artist Bill Peet's children's books. Some of my favorite artists currently are Nick Carver, Sparth, Ryan Lang and Sergei Ryzhov. I also pull a lot of inspiration from the great outdoors; looking at little clumps of flora and imagining what it might be like if it was scaled up and put into an environment.
On Process
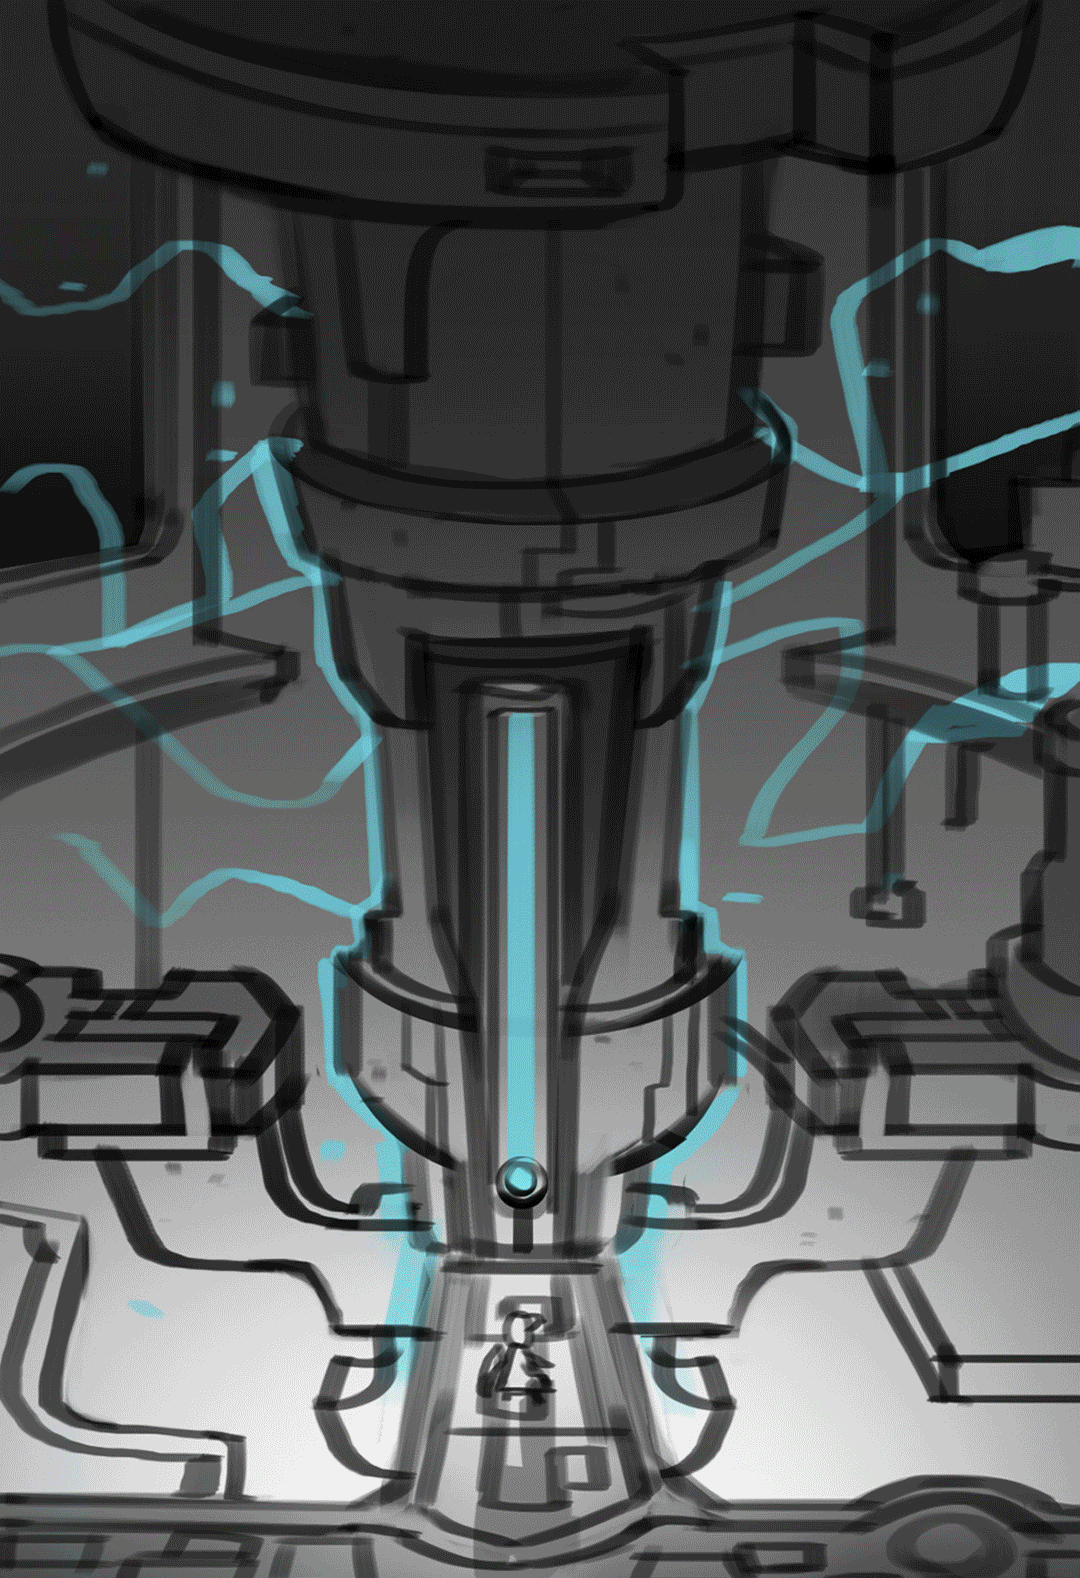 With this project in particular I teamed up with Jason Rumpff, my art buddy, for the thumbnail process. We work together on a lot of projects, bouncing ideas back and forth, which is key. We both created numerous thumbnails, figured out which ones to send, and let the Runic team make the call between our thumbnails. In this case Jason's was picked. From that point I created a rough model of the area in 3D, usually Zbrush or 3D Coat. While putting this together I am usually thinking about color decisions I plan to make. Once I have a nice, rough 3D model, I set up some lights in Keyshot, and render it out, matching the thumbnail as closely as possible. At this opint I also consider anything else I might need to change, such at distracting tangents, etc. Once that's all in place I do a render. These renders usually have lots of issues; the color tends to be off, the geometry is too rough, and there are lots of missing details, but it does give me a really solid perspective and color base to paint on. With the render done I take it into Photoshop and break it up into separate segments, usually foreground, middleground and background. Then I start painting in the major areas, making sure to work all over the canvas as I paint, not getting too caught up in the details. After all the major work is done I start adding in details. The details are a slower process, but very relaxing. Now that the details are in place I start adding more light passes, atmosphere, and any effects that might be in the piece. In this case a lot of lightning! After that is all done I come around for another detail pass, sharpen up some areas, add a bit of noise, do some color and contrast adjustments and poof. The piece is done.
Tomorrow we'll look at the work of Nick Southam, so make sure to check back!